Yesterday was my husband's birthday, and we are celebrating tonight with my family, so I had to make another birthday cake. He already had one a few days ago when we celebrated with our friends, but 2 parties means 2 cakes! I had seen this tutorial on Pinterest and I just knew I had to give it a go, so here are some pics that I took along the way:

As my husband is just a giant kid, I had to make a Teenage Mutant Ninja Turtle cake. TMNT are his favorite, at least 50% of his t-shirts have a turtle on them, he has entered his TMNT collection in the Fair the last 2 years in a row (and won a prize both years), and we have basically a shrine to them in our TV room. Needless to say, he likes the Teenage Mutant Ninja Turtles.
I google image searched TMNT coloring pages and found one that didn't look too complicated, good ol' Raphael over there.
I google image searched TMNT coloring pages and found one that didn't look too complicated, good ol' Raphael over there.
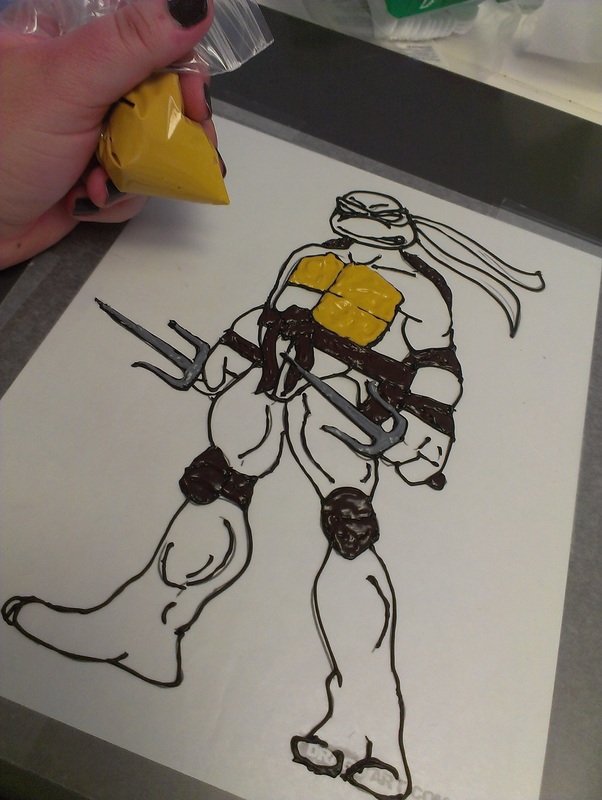
With James nearby to give his opinion on colors, I went to work, starting with the outline. I used plain ol' vanilla frosting out of a can, and tinted it with Wilton cake dyes. I used a plastic zipper bag as my piping bag, and everything went really well!
You know when you are halfway through a craft project and you think to yourself "this is too easy, I'm gonna screw this up eventually, I just know it." No? Is that just me? Anyway, I totally thought this was way to good to be true, it was so easy!
You know when you are halfway through a craft project and you think to yourself "this is too easy, I'm gonna screw this up eventually, I just know it." No? Is that just me? Anyway, I totally thought this was way to good to be true, it was so easy!
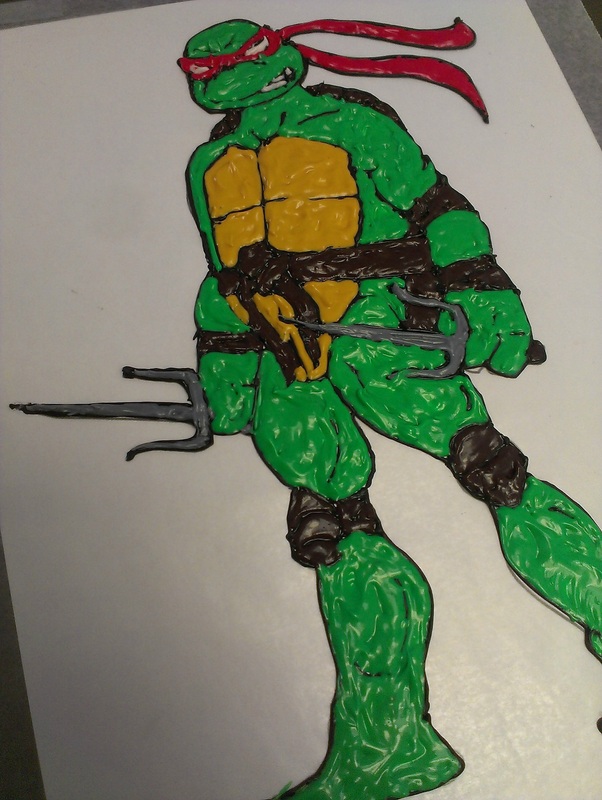
Here's Raph after I finished filling in all the colors. The design I chose was a pretty simple one, so it didn't take too many colors.
James told me where to put what color, and I only screwed up one tiny spot, but no one but James will ever know!
After filling it in a stuck it in the freezer until it was hard. Like, rock hard. Seriously, if you ever do this make sure it is hard as a rock when you go to transfer it to your cake, you will make it a lot easier for yourself.

Here's the finished cake! I just used a box mix and baked it in a 13x9 pan, turned it out when it was cool, and frosted it with the plain white vanilla frosting.
I had to do a little touch up work after I took the wax paper off, it pulled off some of the design with it, so I had to go in with a toothpick and spread some frosting around to fill in the gaps. Overall, it turned out great for my first attempt, and I can't wait to try it again!
I had to do a little touch up work after I took the wax paper off, it pulled off some of the design with it, so I had to go in with a toothpick and spread some frosting around to fill in the gaps. Overall, it turned out great for my first attempt, and I can't wait to try it again!

 RSS Feed
